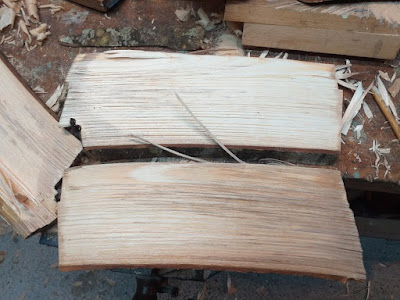
This is the starting material, a spalted log of partly air dried ash wood.
 |
| The log was split in half and then sections of the desired thickness cleaved off. |
Notice in the photo that this log had a well defined curved grain that would be followed when making the frame. The next step was to cleave one of the slices into about 3 cm widths so that each "slice" gave four pieces needed for the frame. I then selected the pieces for the uprights and top/bottom rails. and cut them to the approximate length and selected what would be the reference faces. These were prepared with a roughing or scrub plane first (using a straight edge to decide where to remove wood) and then a joining plane to get a flat surface. The second reference (the narrower of the two) was then planed with a spokeshave at right angles to the first. After this the dimensions were decided and marked from the reference faces with a gauge and then planed to size, finishing with the joining plane on the flat surface and spokeshave on the curved.
The frame was drawn on a piece of A4 paper so that the picture sat squarely and had a border of about 8 mm (for my pictures this was 210 by 140 mm). The pieces of the frame were then aligned with the drawing, made symmetrical as needed, and then the first cross-lap joint on the top was marked with a fine pencil. This was cut with a fine toothed tenon saw keeping to the waste side of the line and the wood removed by a chiselling and finishing with a miniature router (Veritas). The joint was then finely adjusted by chisel to get a tight fit. When all four joints had been cut, they were fitted and the second half of the joint marked with a marking knife and then chiselled to get a close fit. The frames were sanded and treated twice with Danish oil to finish them.
 |
| Finished frames ready for hanging |
No comments:
Post a Comment